- install the Inside Trimmer joists
- install the outside headers
- install the tail joists
- isntall the inside headers
- install the outside Trimmer joists
- install these regular spaced full-length joists
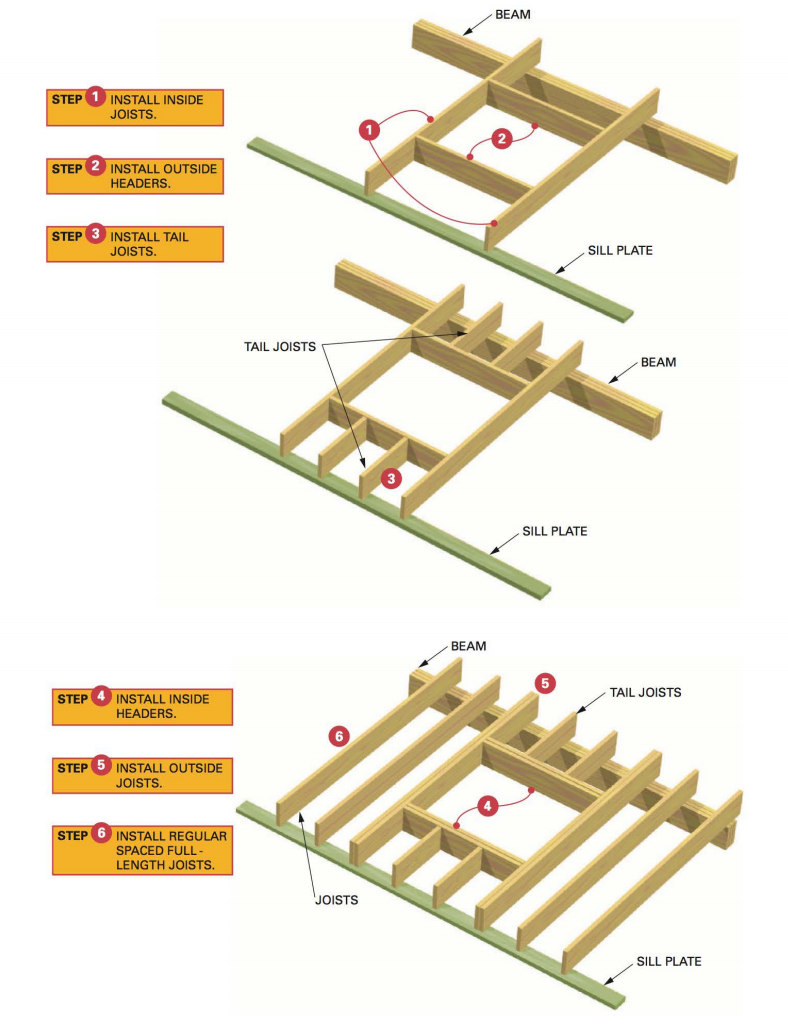
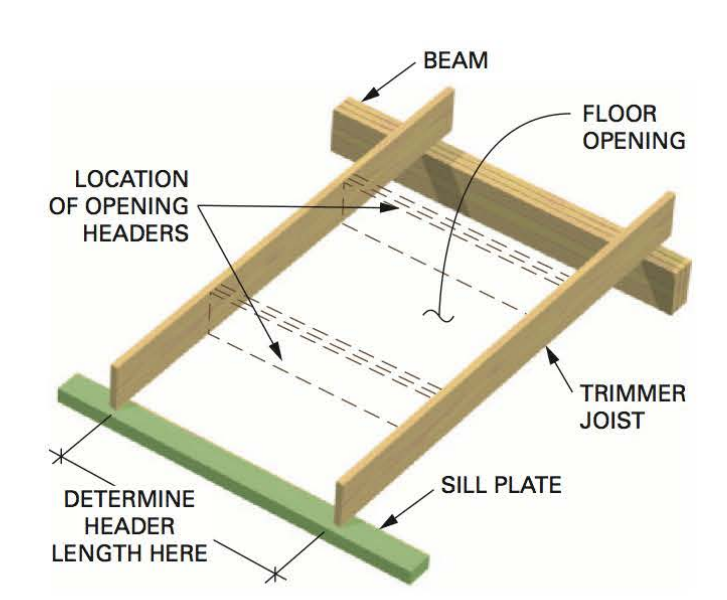
Large openings in floors should be framed before floor joists are installed. This is because room is needed for end-nailing. To frame an opening in a floor, first fasten the trimmer joists in place. Trimmer joists are full-length joists that run along the inside of the opening. Mark the location of the headers on the trimmers. Headers are members of the opening that run at right angles to the floor joists. They must be doubled if they are more than 3′ 11 1/4″ (1.2 m) long.
Cut headers to length by taking the measurement at the sill between the trimmers. Taking the measurement at the sill where the trimmers are fastened, rather than at the opening, is standard practice. A measurement between trimmers taken at the opening may not be accurate. There may be a bow in the trimmer joists.
Place two headers, one for each end of the opening, on the sill between the trimmers. Transfer the layout of the tail joists on the sill to the headers. Fasten the first header on each end of the opening in position by driving nails through the side of the trimmer into the ends of the headers. Be sure that the first header is the header that is farthest from the floor opening. Fasten the tail joists in position. Double up the headers.
Finally, double up the trimmer joists. above step-by-step shows the sequence of operations used to frame a floor opening. This particular sequence allows you to end-nail the members rather than toenailing them. Use joist hangers as required by local codes. Joist hangers must be installed with the correct amount, size, and type of nails. Roofing nails are NOT acceptable for joist hangers.